Yes, I did this. Some of you may know what this is, some of you may not. For those of you who don't, it's basically exactly what it sounds like. You take your placenta and encapsulate it. Well, not me directly. I had someone do it for me. Here's my story.
When I had Lila, I was so excited and determined to breastfeed. I thought it was going to be pretty easy...and it was, physically. Psychologically, not so much. I very soon fell into that category of women who thought I wasn't making enough milk for my baby. This was mainly caused by a doctor that we saw when she was 4 days old and still down from her birth weight. A COMPLETELY normal situation. My milk hadn't really come in yet, but I was actually not even concerned at all until we went to the doctor for a check up. As soon as we left, I started freaking out. "If she hasn't gained by next week, we may need to start supplementing." WHAT??? Already? This was the furthest thing from my mind. I couldn't believe it. I went home with those words in the back of my head.
Now any first time mom would tell you that they were uncertain about things. The next day, I got my pump out and started pumping. (Keep in mind that Lila was only 5 days old at this time.) I was only pumping like 2 oz, which is totally normal for a 5 day old belly. But there it went. It was a numbers game from there. I ran off to Walmart later that afternoon and got a can of formula. Of course she sucked it down when I gave it to her, but THAT, my friends was the beginning of the end of my supply with Lila. 5 days into it. I continued to pump for 12 weeks supplementing a bottle or two a day until I called it quits completely. At that point, I was so stressed about it and not pumping as many times a day as I now know I should've been, that I was making almost no milk at all. I was mentally drained with the breast milk situation. Lila went to straight formula after that.
I want to note that there is absolutely nothing wrong with formula, it's simply a mother's preference on which one they choose to give to their baby. It has been scientifically stated, that breast milk is the perfect food for babies, that's why God gave mother's the ability to produce it. Anyway, this is only the first part of my story.
Part two begins when I'm about 4 months pregnant with my second baby. I had read of placenta encapsulation when Lila was a baby, but never before that so it wasn't an option in my mind with her. A girl I went to grade school with, Emily Stockdale, posted a piece on Facebook that she was going to do this. I immediately remembered that she also had problems with her first baby and milk supply. I read what she wrote and thought, "boy, I would really like to do that too". When she had her second baby, I asked her about the process and her experience with it. She was ecstatic about it all. She was making milk and actually storing some extra. So, I really wanted to do it then. She lives on the west coast and I wasn't sure how popular this process was in the Midwest, let alone small town Southern Illinois. Well low and behold, Emily found a woman in Carbondale who did it. I emailed her and we ended up talking extensively about it. I was sold. Now...selling it to Neil, that's another thing.
It was easier than I thought. He knew the struggles I had, both physically and emotionally with breastfeeding Lila and totally sided with me on this. After all, for $250, you can have someone take your placenta and turn it into pills that will not only help your milk come in faster, but can also assist in postpartum healing, physically and emotionally, as well as help your energy level. Thinking about that number by a dollar sign may seem a little steep, but when you calculate the cost of formula over the course of a year (or even 6 months) it definitely outweighs the $250.
Carolyn was so helpful in educating me on the placenta during pregnancy, during birth, after birth...there are a million things I didn't know. Humans and a few species sea creatures are the only mammals on the planet who do not consume their placenta in some way. I like to say that that's because humans are the only ones smart enough to know that it's kinda weird (hee hee), but seriously, there is a reason all mammals do it. Why not try it out? What could it hurt?
Fast forward to April 27 and Neil has taken the placenta into custody. LOL He had to bring it home for her. Carolyn came to our house and did the whole process. It took about 24 hours. She was done and gone before I even got home from the hospital. AND my kitchen was cleaner than it had been since we moved into the house. HAHA
I got started on the pills, which pretty much just looked like multivitamins in capsule form, as soon as I walked through the door. My milk came in on the next morning. I was in shock! Last time I never felt it come in and even when it was here, it didn't seem like what everyone said would happen, was happening. This time it was like magic. I honestly could not believe it. By the next day, I even had to cut back on the pills because they were doing their job so well! I can say that this time has been just amazing. I can't say that I still didn't freak out and wonder if she was gaining weight, but I trusted my instincts a little better this time. I didn't let a doctor (from who we have since switched) freak me out into giving formula and essentially tanking my supply within days of birth. I had great resources and great support from my husband. All in all, I'd say that breastfeeding this time has been a huge success! I'm getting ready to go back to work and will be starting my pumping routine, but I have hopes that this is all going to work out fine!
If anyone in the Southern Illinois area would like the name and number of the woman who did my placenta encapsulation, feel free to email me! I'll happy to pass this information on, I just didn't know if she would want me to publish her information here publicly.
Thursday, June 27, 2013

Thursday, June 13, 2013
Vivian Ruth
I'm sorry it's taken me so long to post on baby sister's birth, BUT it's harder to find the time with two. :) I have lots of stuff that I am wanting to post so sit tight and watch for multiple posts today and tomorrow!
The day was April 26, 2013. I had had about enough of work for the week and the day before had decided that I needed a day off. I took a personal day on April 26. I had a hair appointment and was going to take a few hours anyway, so why not the whole day?
I got up early and took Lila to daycare (this was a personal day after all) and came home and enjoyed my coffee. I took a look around the house and thought, "what baby would want to come home to this house?". It was filthy. It was a mess. So I headed of to the wonderful world of Walmart and stocked up on some cleaning supplies. It was amazing. I came home and did some laundry, cleaned the bathroom, the kitchen, the bedrooms, the floors, dusted, cleaned the fans. You name it, I did it. It still wasn't perfect though.
I headed off to my hair appointment and thought, maybe this sweet baby is just looking out for me. She doesn't want to come when my hair isn't ready...there would be pictures of course and what girl wants to look back and think, "my mom's hair was awful when I was born". LOL It was also a relaxing afternoon.
I got home in time to clean up a little more and then went to pick Lila up. We both decided that I wasn't going to be cooking supper that night (remember the personal day??) and Neil was working since it was a Friday. When I asked Lila where she wanted to eat, she of course chose Mackie's. Off to Mackie's we go.
Well, we no more walked through the door at Mackie's and my water broke at 6:00 PM. REALLY???? Not only was I starving from all the work I'd done all day, but Lila wasn't the only one craving Mackie's. Damn....
We ordered anyway because I wasn't 100% sure that my water broke. (Who am I kidding? Of course I was sure...I just couldn't believe it.) I let Lila play some games while I convinced myself that, yes this was all happening. I texted Neil and told him, knowing that he probably wouldn't answer a call since he was working. I called my mom, who mind you had been stalking me for the past week asking me if I was in labor, and she didn't answer. I called my dad...WHO DIDN'T ANSWER! Are we seeing a trend here?? Don't leave me hanging people! Finally got a hold of Deanna (who was with dad) and told them to get home because I had to bring Lila over.
You may be thinking, why on earth are you freaking out? This is your second and you know how long these things take. That's the thing. My labor with Lila was on the short side and everyone, EVERYONE, had told me that this one would go faster and not to waste any time getting to the hospital.
I finally got Neil by calling the ER. We got our crap together and to Carbondale we drove. The contractions were not as noticeable this time around. Got to Carbondale in a reasonable amount of time and got in the "holding cell" as I like to call it. I honestly don't know what it's really called, but it's the dreadful place where they put you where you have to sit and answer questions and get your labs done and make sure you're really in labor. It's a fun little place...not. It is quite entertaining seeing who is in labor with you and hearing them answer questions. LOL There are some dandies out there. I was dilated to a 4 when I got there, which was decent progress since I was dilated to a 3 at my appointment two day prior.
We finally made the move to the delivery room where I could relax and just, well labor. I knew a little more this time than I did last time so I walked the halls. I walked and walked and walked and folks, it truly helped the pain. I never did this with Lila. The nurse made me come back in every 45 min or so to check the contractions and fetal heart tones. It was dreadful in the room. By about 10:00, I'm thinking, we should be getting pretty close. I labored about 6-7 hours with Lila and this was supposed to be faster, right? I was STILL at a 6. I was making no progress, hour by hour. The minutes and hours just kept ticking. I was stuck...stuck at a 6 and not going anywhere. She was really low, but my body wasn't cooperating. Finally about 2:00, yes you read that right, 2:00 AM, Dr. Mulch came in and checked me again. She said she felt a pocket of fluid that had kinda wedged it's way to the side. She was going to pop it. And boy did she ever! Up to this point, I was doing great on IV pain meds and so far had not needed the epidural. She popped that pocket and I swear to you it sent me in a pain level I've never experienced. (I must've gotten the epi before that point with Lila). As you can imagine, the anesthesiologist was ordered and arrived very quickly. I got the epi and rested for about an hour before she was basically coming out on her own.
Dr. Mulch came in and two pushes later, baby sister was here. 4:03 AM 6 lbs 7.3 oz and 19 1/2 in long. She had a head full of dark brown hair and was just beautiful. She was bright eyed and ready to go. She was all smashed from being so low for so long and snorting a lot. Sweet little smashed piggy. We loved her already! Then they asked for a name...uhhhh Neil? What do you think? Vivian? Sure. I mean, unless you have something else? No? Ok...Vivian Ruth it is! LOL That's pretty much how it happened. :)


Later that day my dad brought Lila over to meet her new sister and she was just thrilled. I almost cried. It wasn't just my little Lila anymore. I couldn't spend all my time with her. Now I was going to have to manage to spend time with both of them. Tear...tear...tear...we'll cross that bridge later. Fast forward several weeks and Lila still loves her baby sister.


The day was April 26, 2013. I had had about enough of work for the week and the day before had decided that I needed a day off. I took a personal day on April 26. I had a hair appointment and was going to take a few hours anyway, so why not the whole day?
I got up early and took Lila to daycare (this was a personal day after all) and came home and enjoyed my coffee. I took a look around the house and thought, "what baby would want to come home to this house?". It was filthy. It was a mess. So I headed of to the wonderful world of Walmart and stocked up on some cleaning supplies. It was amazing. I came home and did some laundry, cleaned the bathroom, the kitchen, the bedrooms, the floors, dusted, cleaned the fans. You name it, I did it. It still wasn't perfect though.
I headed off to my hair appointment and thought, maybe this sweet baby is just looking out for me. She doesn't want to come when my hair isn't ready...there would be pictures of course and what girl wants to look back and think, "my mom's hair was awful when I was born". LOL It was also a relaxing afternoon.
I got home in time to clean up a little more and then went to pick Lila up. We both decided that I wasn't going to be cooking supper that night (remember the personal day??) and Neil was working since it was a Friday. When I asked Lila where she wanted to eat, she of course chose Mackie's. Off to Mackie's we go.
Well, we no more walked through the door at Mackie's and my water broke at 6:00 PM. REALLY???? Not only was I starving from all the work I'd done all day, but Lila wasn't the only one craving Mackie's. Damn....
We ordered anyway because I wasn't 100% sure that my water broke. (Who am I kidding? Of course I was sure...I just couldn't believe it.) I let Lila play some games while I convinced myself that, yes this was all happening. I texted Neil and told him, knowing that he probably wouldn't answer a call since he was working. I called my mom, who mind you had been stalking me for the past week asking me if I was in labor, and she didn't answer. I called my dad...WHO DIDN'T ANSWER! Are we seeing a trend here?? Don't leave me hanging people! Finally got a hold of Deanna (who was with dad) and told them to get home because I had to bring Lila over.
You may be thinking, why on earth are you freaking out? This is your second and you know how long these things take. That's the thing. My labor with Lila was on the short side and everyone, EVERYONE, had told me that this one would go faster and not to waste any time getting to the hospital.
I finally got Neil by calling the ER. We got our crap together and to Carbondale we drove. The contractions were not as noticeable this time around. Got to Carbondale in a reasonable amount of time and got in the "holding cell" as I like to call it. I honestly don't know what it's really called, but it's the dreadful place where they put you where you have to sit and answer questions and get your labs done and make sure you're really in labor. It's a fun little place...not. It is quite entertaining seeing who is in labor with you and hearing them answer questions. LOL There are some dandies out there. I was dilated to a 4 when I got there, which was decent progress since I was dilated to a 3 at my appointment two day prior.
We finally made the move to the delivery room where I could relax and just, well labor. I knew a little more this time than I did last time so I walked the halls. I walked and walked and walked and folks, it truly helped the pain. I never did this with Lila. The nurse made me come back in every 45 min or so to check the contractions and fetal heart tones. It was dreadful in the room. By about 10:00, I'm thinking, we should be getting pretty close. I labored about 6-7 hours with Lila and this was supposed to be faster, right? I was STILL at a 6. I was making no progress, hour by hour. The minutes and hours just kept ticking. I was stuck...stuck at a 6 and not going anywhere. She was really low, but my body wasn't cooperating. Finally about 2:00, yes you read that right, 2:00 AM, Dr. Mulch came in and checked me again. She said she felt a pocket of fluid that had kinda wedged it's way to the side. She was going to pop it. And boy did she ever! Up to this point, I was doing great on IV pain meds and so far had not needed the epidural. She popped that pocket and I swear to you it sent me in a pain level I've never experienced. (I must've gotten the epi before that point with Lila). As you can imagine, the anesthesiologist was ordered and arrived very quickly. I got the epi and rested for about an hour before she was basically coming out on her own.
Dr. Mulch came in and two pushes later, baby sister was here. 4:03 AM 6 lbs 7.3 oz and 19 1/2 in long. She had a head full of dark brown hair and was just beautiful. She was bright eyed and ready to go. She was all smashed from being so low for so long and snorting a lot. Sweet little smashed piggy. We loved her already! Then they asked for a name...uhhhh Neil? What do you think? Vivian? Sure. I mean, unless you have something else? No? Ok...Vivian Ruth it is! LOL That's pretty much how it happened. :)
Tuesday, April 16, 2013
Keep on truckin'...
Today I'm 37 weeks which many obstetricians consider "full term". Basically all this means is that if I went into labor now, they wouldn't try to stop me. If I had a baby now, she would more than likely be fine. However, the longer she stays in the better it is for her lungs and the more chance she had to pack on some fat.
I'm still running, but my dear friend Alecia has taken over my spin class. It was getting a little hard to lean forward on the handle bars and perform the sprints. My classes were consisting mostly of hills at this point. Hee hee! Since it's been nicer outside, I've been getting to play, do yard work, and run. I've also been taking Lila on walks...which sometimes she loves and sometimes she hates.
Speaking of the big sister, she's about as ready as I am to have this baby. She asks all the time about Baby Sister and tells me what she's going to do to help. I'm hoping that her being here will still bring out the same feelings that Lila has for her now. :) She really is going to be a great big sister, I think.
So now...if anyone who is reading my blog has ANY tips on handling the first days/weeks of a newborn and toddler, please comment! I'd love to hear what worked or didn't work for you. We are so excited about the newest addition and very anxious for her arrival! Also, I guess at this point, you may as well put any name suggestions in the hat too! LOL Nothing too trendy or too weird. I like old-fashioned, classical names.
Have a wonderful day!
I'm still running, but my dear friend Alecia has taken over my spin class. It was getting a little hard to lean forward on the handle bars and perform the sprints. My classes were consisting mostly of hills at this point. Hee hee! Since it's been nicer outside, I've been getting to play, do yard work, and run. I've also been taking Lila on walks...which sometimes she loves and sometimes she hates.
Speaking of the big sister, she's about as ready as I am to have this baby. She asks all the time about Baby Sister and tells me what she's going to do to help. I'm hoping that her being here will still bring out the same feelings that Lila has for her now. :) She really is going to be a great big sister, I think.
So now...if anyone who is reading my blog has ANY tips on handling the first days/weeks of a newborn and toddler, please comment! I'd love to hear what worked or didn't work for you. We are so excited about the newest addition and very anxious for her arrival! Also, I guess at this point, you may as well put any name suggestions in the hat too! LOL Nothing too trendy or too weird. I like old-fashioned, classical names.
Have a wonderful day!
Monday, April 8, 2013
Baby Sister Stuff
Finally starting to get things done in Baby Sister's room. Hopefully she will be here soon, but not TOO soon. Just some updates.


- I'll be 36 weeks tomorrow.
- We have still not picked out a name.
- Lila is ready for her to be here. This pregnancy has been more uncomfortable than my first, but still not too bad. My only complaint is that I've had a stomach bug twice this time. Not fun at all.
- Neil is up to his ears in PINK! He knows now that even if we do try again and we get a boy, he's out-numbered.
- I've been much happier since the weather has gotten a little warmer and I can get outside and play with Lila or go for runs.
- I can still wear my wedding rings (which is a HUGE deal for me at this point).
Love these new outfits that she got. They are so cute!

Lila has a matching one! Awwww....

Thursday, March 21, 2013
33 weeks
I am 33 weeks along this week with Baby Sister or GoGo as Lila calls her. We are just about ready. The nursery could use a little more TLC, but I really need to come up with some wall decor. It's a little bare right now. :( I did get some quality time with my sewing machine last week to make some baby things for my sister-in-law's baby shower. She's due a week ahead of me and is also having a girl. There's going to be a lot of baby stuff this summer. On top of that, lots of PINK!
Speaking of pink, I've been purchasing a few items for the baby in the clothing department. Since Lila was born in September, the seasons are off just enough to where this baby won't get to use quite as much as we were hoping. I think once the fall and winter are here, we may be able to use some stuff, but this poor child is entitled to her share of "new" stuff too, right? :) Some of the cutest things I've found have NOT been pink and I'm thrilled! Seems like all things little girl are pink. I was even able to find matching (sorta, which is good because I'm not big on "matchy matchy" outfits) for Lila and baby.
Not really much else to talk about as of right now. Things have sorta died down a little around our house since basketball is over and Capel's basketball team brought home the STATE CHAMP trophy!! WOOOOOOHOOOOOOOOOOOOOO!!!!!!!!!!!!!!!!!!!! In case you can't tell, we're all pretty happy (and a little proud) of these boys! Great kids!
Here's the pics for those of you asking. I feel like I always look a lot more tired in every pic during this pregnanct. LOL I wonder why!!


Speaking of pink, I've been purchasing a few items for the baby in the clothing department. Since Lila was born in September, the seasons are off just enough to where this baby won't get to use quite as much as we were hoping. I think once the fall and winter are here, we may be able to use some stuff, but this poor child is entitled to her share of "new" stuff too, right? :) Some of the cutest things I've found have NOT been pink and I'm thrilled! Seems like all things little girl are pink. I was even able to find matching (sorta, which is good because I'm not big on "matchy matchy" outfits) for Lila and baby.
Not really much else to talk about as of right now. Things have sorta died down a little around our house since basketball is over and Capel's basketball team brought home the STATE CHAMP trophy!! WOOOOOOHOOOOOOOOOOOOOO!!!!!!!!!!!!!!!!!!!! In case you can't tell, we're all pretty happy (and a little proud) of these boys! Great kids!
Here's the pics for those of you asking. I feel like I always look a lot more tired in every pic during this pregnanct. LOL I wonder why!!
So this is me pregnant with baby now at 33 weeks

And this is 32 weeks with Lila

Tuesday, March 5, 2013
DIY Crib Bumpers
After making the crib skirt last week, I have been so anxious to get started on the bumpers. I have looked and looked for tips and tutorials and some I have liked a lot, but most of those had piping on them and I honestly didn't know if I was capable of making them with piping. It didn't look hard, but a couple of bloggers did say it was tedious. So I just kinda ended up doing my own thing. I did reference this blog though for certain answers to questions that arose.
I had two yards of the floral fabric I wanted to use, but didn't really have anything for the "backside" of the bumpers. Since we live a good 45 min away from the nearest open fabric store, I hopped in the car and went to Wal-Mart. It's not my favorite place, but it would have to do if I was going to get these bumpers done any time soon. Our Wal-Mart does have pre-cut fabric in two yard sections. I found a hot pink that went with the floral as best as any color that they had would. I didn't want to use hot pink, but now that they are done, I'm so glad I went with it. By the way, I got all of my fabric for the bedding at Hobby Lobby with the exception of the hot pink.
I'm going to try to explain how I did these the best I can, but I'm sure I'll leave something out. If anyone would have questions (and I don't know why you be asking me, honestly) you can email me and I'll answer!
I started by measuring the crib to see how long each side needed to be. I made 4 separate bumpers. Some tutorials you see has them in 6 sections and a lot of store bought bumpers, like the ones we had for Lila, are just one big bumper that goes all the way around. I liked the look best of the all the way around ones, BUT there was no way I as going to be able to make that look good, so the next best thing was 4 sections.
My crib measured 51" wide and 27" deep. So for the front and back I needed 52" including the 1/2" seam on both ends. For the sides I needed 28" including the 1/2 " seam on both ends. I also knew that I wanted my bumpers to be 10" tall, so I measured 11" to include the seam. Now, I will say that I kinda wish I would've gone with an extra inch on the width, but I'm not crying over it. They still look good.




Once I had stuffed it up, I re-pinned that side and stitched it up. I also read in the blog above that IF she ever made bumpers again, she would use ribbon to tie them on instead of making the ties out of the fabric that she used for the bumpers. After seeing that I was going to have to measure, cut, and stitch up 28 ties, I very quickly decided that I would just use the ribbon AND cut a few corners and just do 6 ties for each front and back and 4 for the sides. I stitched the ribbon to the appropriate places on the bumper and that was that! They were done!

I don't know where I saw this idea of flipping the back bumper the with the "back" facing forward, but I really liked and decided to do it and I'm glad I did. I really like how it looks.


I feel like the stuffing may be a little scant on the front right side, but I'm not sure that I will be cutting it open and stuffing more in. I think I'll just call it a lesson learned and see if I can tie it a little differently to make it look better. All in all, I'm VERY happy with how they turned out. This is the first time I've ever taken on a project like this and I'm quite proud of myself for not only finishing it, but finishing it successfully! To see how I made the crib skirt, check out this post!

I had two yards of the floral fabric I wanted to use, but didn't really have anything for the "backside" of the bumpers. Since we live a good 45 min away from the nearest open fabric store, I hopped in the car and went to Wal-Mart. It's not my favorite place, but it would have to do if I was going to get these bumpers done any time soon. Our Wal-Mart does have pre-cut fabric in two yard sections. I found a hot pink that went with the floral as best as any color that they had would. I didn't want to use hot pink, but now that they are done, I'm so glad I went with it. By the way, I got all of my fabric for the bedding at Hobby Lobby with the exception of the hot pink.
I'm going to try to explain how I did these the best I can, but I'm sure I'll leave something out. If anyone would have questions (and I don't know why you be asking me, honestly) you can email me and I'll answer!
I started by measuring the crib to see how long each side needed to be. I made 4 separate bumpers. Some tutorials you see has them in 6 sections and a lot of store bought bumpers, like the ones we had for Lila, are just one big bumper that goes all the way around. I liked the look best of the all the way around ones, BUT there was no way I as going to be able to make that look good, so the next best thing was 4 sections.
My crib measured 51" wide and 27" deep. So for the front and back I needed 52" including the 1/2" seam on both ends. For the sides I needed 28" including the 1/2 " seam on both ends. I also knew that I wanted my bumpers to be 10" tall, so I measured 11" to include the seam. Now, I will say that I kinda wish I would've gone with an extra inch on the width, but I'm not crying over it. They still look good.

So I made the cuts to 8 pieces of fabric, 4 floral and 4 hot pink, a front and back for each bumper. I ironed the fabric to make all of the nasty wrinkles, which were especially bad in the hot pink because it was wrapped so tight since it was pre-measured and put into packaging and then started pinning up the seams.


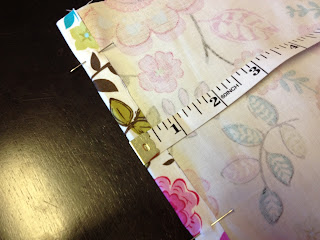
Now I'm going to tell you that I think I probably could've cut about two hours out of my project if I just wanted a regular seam with the two fabrics. A seam like a pillow case or the one you see in the tutorial I linked above, but of course I had to make things hard. I wanted a seam like you can see (kind of) below. So I had to (and I did learn a little bit more each time I made a section on how to make the next one a little easier. Essentially, I had to measure a 1/2" seam 8, I'll say it again, 8 times for each section. It got a little tiring.

Once I stitched up 3 of the four sides of the bumper, I then got out my quilt batting and eyeballed the measurements of that and then stuffed it in there. Quilt batting was the best thing I could find to do the stuffing. I found some memory foam type stuffing that actually looked like it could work, but it was more expensive and I just wasn't sure if it would work for me...being a first timer on this bumper stuff.

Once I had stuffed it up, I re-pinned that side and stitched it up. I also read in the blog above that IF she ever made bumpers again, she would use ribbon to tie them on instead of making the ties out of the fabric that she used for the bumpers. After seeing that I was going to have to measure, cut, and stitch up 28 ties, I very quickly decided that I would just use the ribbon AND cut a few corners and just do 6 ties for each front and back and 4 for the sides. I stitched the ribbon to the appropriate places on the bumper and that was that! They were done!

I don't know where I saw this idea of flipping the back bumper the with the "back" facing forward, but I really liked and decided to do it and I'm glad I did. I really like how it looks.


I feel like the stuffing may be a little scant on the front right side, but I'm not sure that I will be cutting it open and stuffing more in. I think I'll just call it a lesson learned and see if I can tie it a little differently to make it look better. All in all, I'm VERY happy with how they turned out. This is the first time I've ever taken on a project like this and I'm quite proud of myself for not only finishing it, but finishing it successfully! To see how I made the crib skirt, check out this post!

Friday, March 1, 2013
DIY Crib Skirt
I knew that I didn't want to spend a ton of money on the crib bedding this time (last time we got it as a gift from my girlfriends, but I remember how expensive it was) so I started looking into other options, i.e. making my own. I found a couple of tutorials on Pinterest and used a really easy one that I really thought was manageable. The title of this blog post really caught my eye and this is what I ended up going with. I looked at it and thought, yep...I can do this! I had three different patterns of material because originally I was going to do a ruffled crib skirt. I have made a ruffled Christmas Tree skirt, but that was so easy using hot glue! I knew I didn't want to use hot glue on this and I also knew that I didn't want to spend any extra money experimenting and have to go buy more material. I wasn't confident enough in making ruffles for this big of a project. The changing of the plan of what kind of skirt I was going to do kinda threw a wrench in my plan and I wasn't sure if the amount of material I got for each pattern was going to work. But I just started it and got as much done as I could.
These are the three patterns I chose. I was really excited once I finally picked them out! I decided on the chevron stripes and the polka dots for the skirt and the floral for the bumper.

I really liked this simple style of skirt so I attempted it. I liked the idea of a different pattern at the bottom and I did have three patterns. I think this bedding is from Pottery Barn Kids.

I had to write my plan all out to make sure I made the cuts right and you will see later that my pregnancy brain really set in with this. I ended up wasting some material, but that's all part of the experience, right?? :)

The top rectangle is the front of the crib and the one on the bottom is the sides of the crib. The piece of material that I had was just short of being long enough to span the entire 53" that I needed so I ended up making that into two separate pieces, which is kind of what the picture above looked like.
So I got the two front sides all measured and cut AND pinned, then I remembered that I was going to put the polka dot material on the bottom. (palm, meet forehead) DUH! So then I had to take off my shoes and use my toes for the math and recalculate everything. This is where my mom will tell you that I've never been great at general math.

I remeasured, re-cut and got everything pinned to be ready to sew. I wasted a little material trying to get chevron stripes to match up as best as possible (another lesson learned). Then came the easy part, the sewing!
I got so into the project that I forgot to take many pictures during the process, but most of the pictures on the blog that I got the tutorial from are pretty accurate to what I did, with the exception of the bottom piece of material with the different pattern.
I sewed up the seams on all four sides of the pieces and then got some ribbon that I had on hand and sewed those pieces of ribbon to the tops of the sections to tie them to the springs. I think that the binder clips in the tutorial will actually work much better for my crib because of the way the springs are under the mattress.

I got the front and one side finished that night. With the "mess-ups" that I had I think I'm going to have to go get another half yard to make the other side of the skirt, but I think it will go fairly quickly since I now know what I'm doing. My friend Sarah gave me several of her crib sheets from her girls and I went with one that was light pink and white stripes. Next I'm going to be tackling the bumpers with the floral material.

These are the three patterns I chose. I was really excited once I finally picked them out! I decided on the chevron stripes and the polka dots for the skirt and the floral for the bumper.

I really liked this simple style of skirt so I attempted it. I liked the idea of a different pattern at the bottom and I did have three patterns. I think this bedding is from Pottery Barn Kids.

I had to write my plan all out to make sure I made the cuts right and you will see later that my pregnancy brain really set in with this. I ended up wasting some material, but that's all part of the experience, right?? :)

So I got the two front sides all measured and cut AND pinned, then I remembered that I was going to put the polka dot material on the bottom. (palm, meet forehead) DUH! So then I had to take off my shoes and use my toes for the math and recalculate everything. This is where my mom will tell you that I've never been great at general math.

I got so into the project that I forgot to take many pictures during the process, but most of the pictures on the blog that I got the tutorial from are pretty accurate to what I did, with the exception of the bottom piece of material with the different pattern.
I sewed up the seams on all four sides of the pieces and then got some ribbon that I had on hand and sewed those pieces of ribbon to the tops of the sections to tie them to the springs. I think that the binder clips in the tutorial will actually work much better for my crib because of the way the springs are under the mattress.


I was getting pretty nervous about how it would all go together but I held it up last night and I think it will look amazing! I'm really excited about how the pinks, oranges, and yellows will pop and really "work" with the other colors I have. Stay tuned for the DIY Crib Bumper post to come soon! I would really like to get this finished pretty soon!
Subscribe to:
Posts (Atom)